
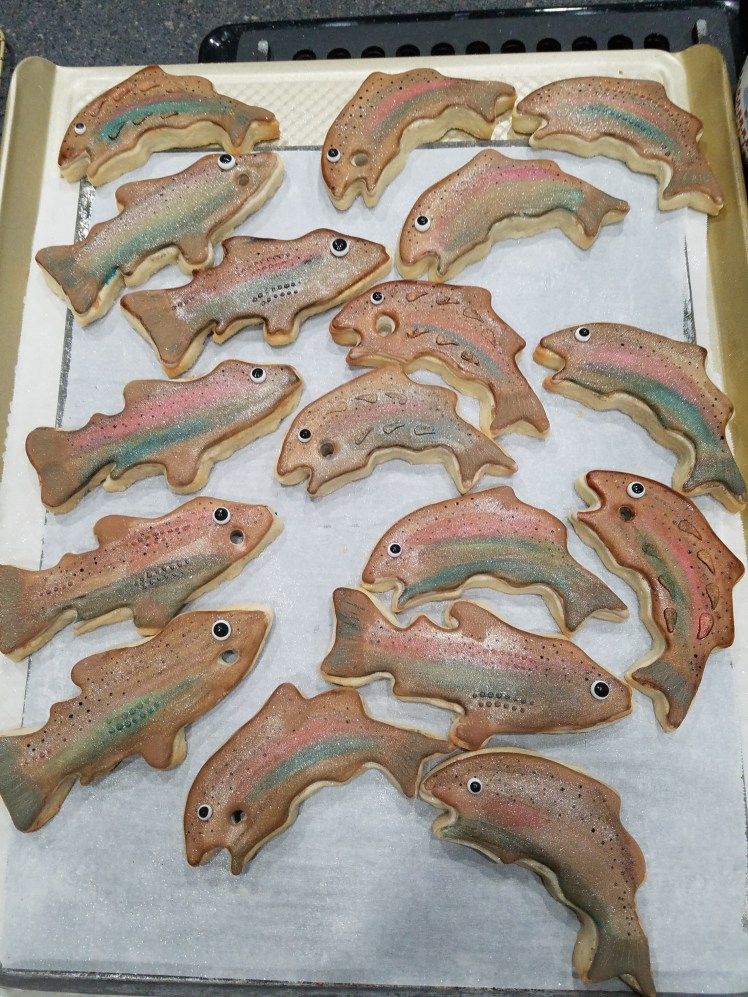
Michigan Sea Grant’s resident baker (and intrepid administrative assistant) Vanessa Pollok crafted these amazing fish-shaped cookies for a summer staff retreat. The team marveled at the realism of her piscine paintings — and promptly ate every single one. What a perfect addition to your holiday baking for the angler on your list!
Here are Vanessa’s instructions:
“These cookies started out as an experiment. Although they seem complicated, they’re fairly easy (drying time for the frosting takes longer than actual cookie work time). There’s a lot of information here, so take time to read it all and collect your supplies.
Supplies you will need include:
- Fish-shaped cookie cutter (mine came from a set at Gander Mountain)
- Sugar cookie dough (I’ve included my recipe below, but you can use whatever you prefer — including store-bought dough — as long as it can be rolled out)
- Royal icing (my recipe is included below, but feel free to swap in your favorite recipe)
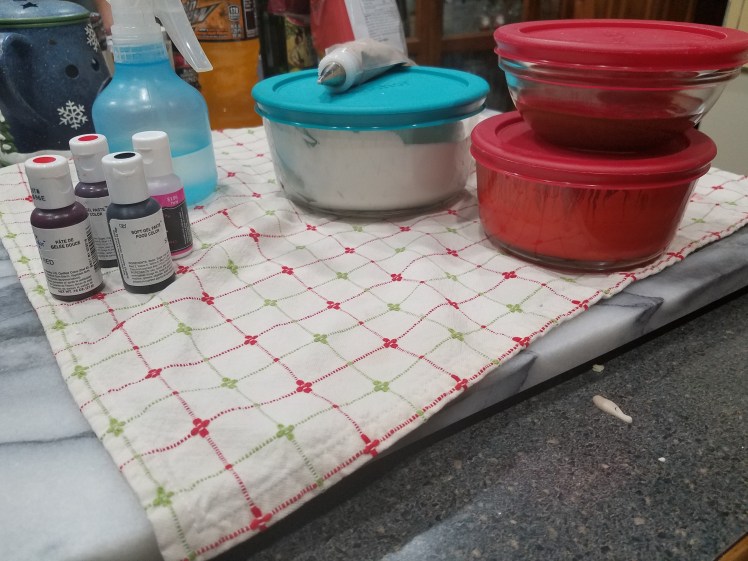
- Food coloring (I prefer AmeriColor brand; others include Wilton, McCormick, etc.) to tint the royal icing and paint onto the hardened icing
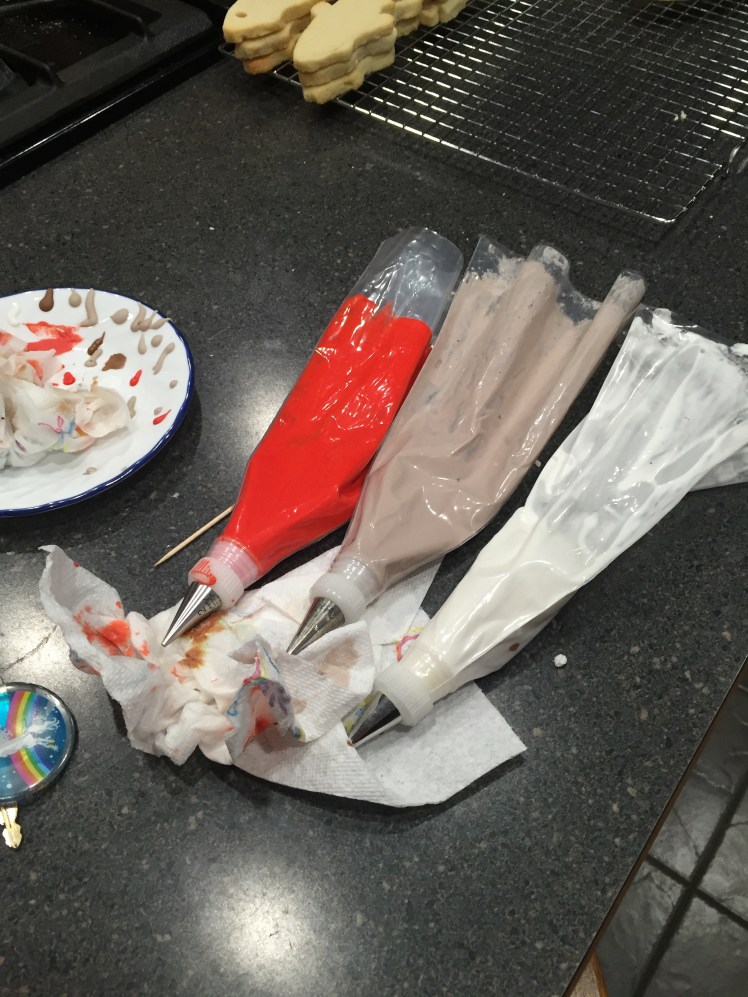
- Piping bags
- Small paintbrush
- Toothpick
- Set of small bowls or containers for mixing food coloring
The Cookies:
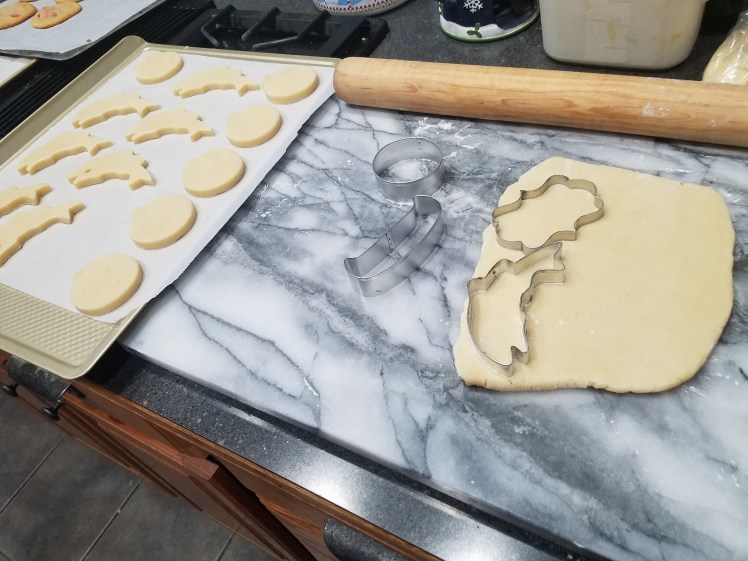
Go ahead and prepare the cookie dough (scroll down to find my recipe or use your own). Roll it out according to the recipe’s directions, cut it into shapes, and bake.

The Icing
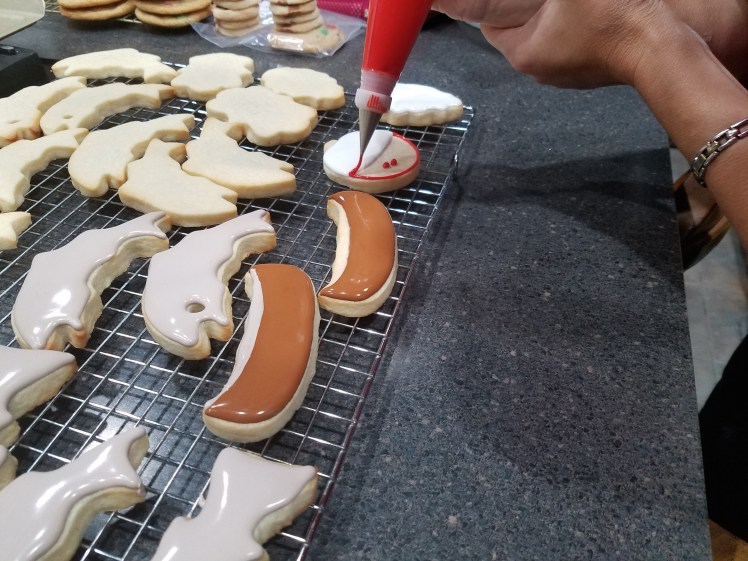
For the icing, I use the recipe included below and add just enough water to bring it to “flooding” consistency (that is, stiff enough to cover the surface of the cookie without running off the edges).
This YouTube video offers a great tutorial on 1) making royal icing, 2) getting it to flooding consistency, and 3) piping it onto a cookie. If you’re new to royal icing, take a look. For piping bags, I usually buy Wilton brand tips and bags. You can also use a sandwich baggie with the corner snipped off.
If I’m making multiple kinds of iced cookies, I divide the icing recipe into separate containers so I can use food coloring to tint each batch. If you’re only making the fish cookies, set some icing aside to tint black (for the eyes and gills) and leave some white (for the eyes). Tint the rest light brown (for the fish bodies).
**NOTE** The frosted cookies will need to set up for about 6-8 hours before you paint them. This is critical for making sure the icing is firm and the color won’t bleed when you start painting.
The Painting
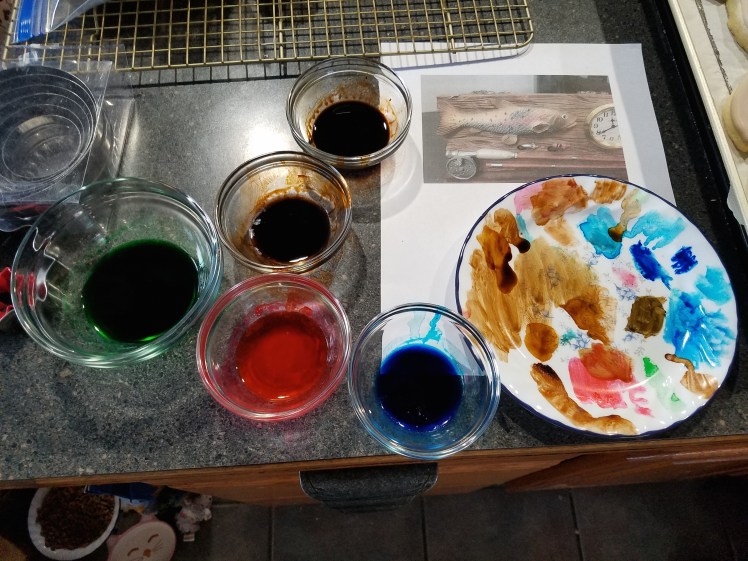
Once the icing is firm on the cookies, you can start painting! For my favorite fish design, I use the following AmeriColor Soft Gel Paste colors (available online and in some craft stores): Electric Blue, Forest Green, Chocolate Brown, Soft Brown, and Soft Pink.
I put about 3-4 drops of each color in separate small bowls or containers, then add a small amount of water (from a few drops to a teaspoon, depending on how dark I want the color to be). I sometimes swap out some or all of the water for lemon extract. I play around a bit with the colors on a plate before I start painting the cookies to make sure the paints are the shades and hues I want. I also print out an example photo of the kind of fish I want to recreate.
Then, it’s time to paint the colors on the cookies! I tend to paint dark colors at the top and bottom and use the lighter colors in the middle. You can always add more color if it’s too light and adjust if it’s too dark.
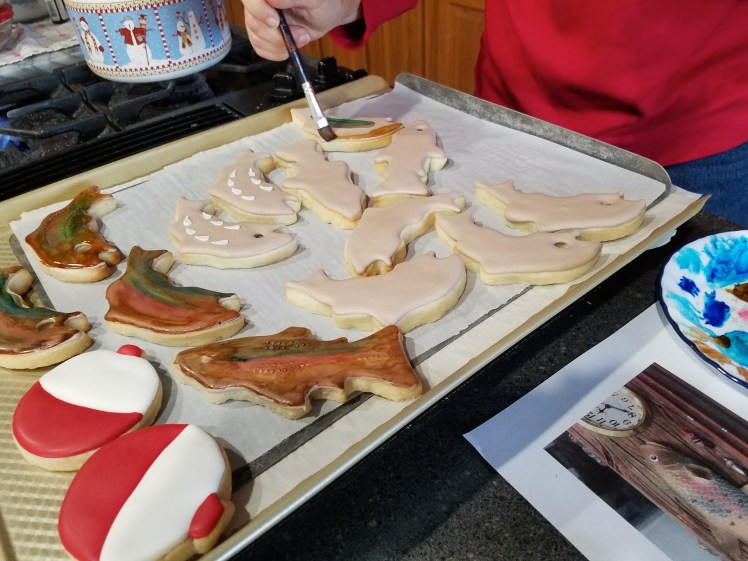
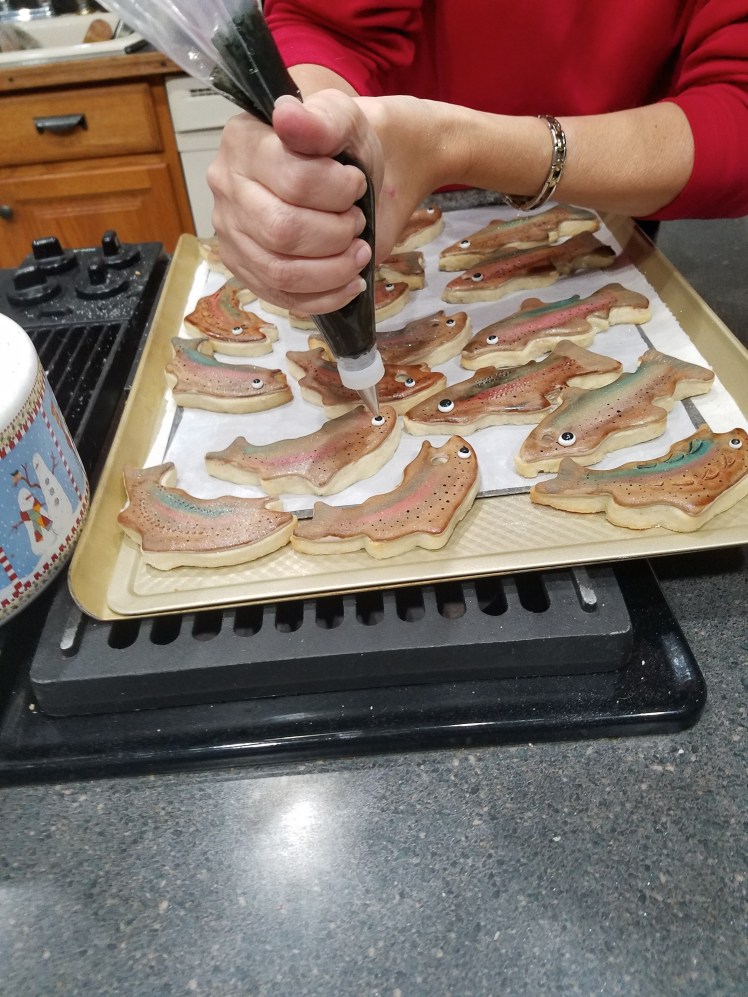
The cookies don’t need much drying time before you add the spots, gills, and eyes. I take a toothpick and dip it in some black food coloring and then dab on the cookie to create spots. I then use dots of white and black frosting for the eyes and short stripes of black frosting for the gills.
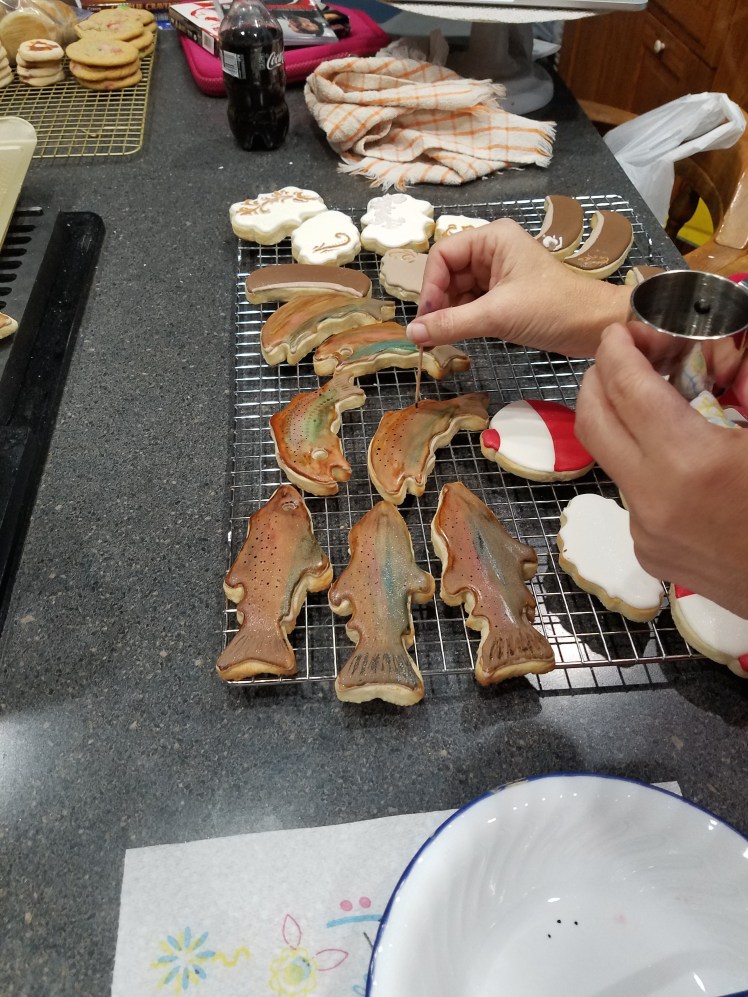
You can even shake on some edible luster dust (available online or at craft stores) to give the cookies an extra shine. Enjoy!”
The Recipes
Cream Cheese Sugar Cookies
(Recipe comes from Pillsbury’s Lovin’ from the Oven cookbook)
Ingredients for the cookies
1 cup sugar
1 cup margarine or butter, softened
1 3-ounce package of cream cheese, softened
1/2 teaspoon salt
1/2 teaspoon almond extract
1/2 teaspoon vanilla
1 egg yolk (set egg white aside)
2 cups all-purpose flour
Preparation for the cookies
- In large bowl, combine sugar, margarine or butter, cream cheese, salt, almond extract, vanilla, and egg yolk; blend well.
- Lightly spoon flour into measuring cup; level off. Stir in flour until well blended.
- Refrigerate dough for 2 hours to make it easier to handle.
- Heat oven to 375 degrees Fahrenheit.
- On lightly floured surface, roll our dough 1/3 at a time to 1/8-inch thickness.
- Cut into desired shapes with lightly floured cookie cutters.
- Place 1 inch apart on ungreased cookie sheets. Bake at 375 degrees for 7-10 minutes or until light golden brown.
- Cool completely and remove from cookie sheets.
Royal Icing
(Recipe from cooks.com)
Ingredients for the icing
3 egg whites
1 lb. confectioner’s sugar
1/2 teaspoon cream of tartar
1/2 tsp almond extract or vanilla extract
Food coloring
Preparation for the royal icing
- Place all ingredients in bowl and beat with an electric mixer on medium-high for a full 10 minutes. Icing will become thick and glossy but will not increase in volume.
- Keep bowl covered with damp cloth while icing cookies, removing small portions as needed.
- Use food coloring to tint the icing. To thin, add a few drops of water.

Nice Vanessa, you are very talented.
LikeLike
Absolutely beautiful! You are jot just a great baker, you are an artist.
LikeLike
I like your spirit. the fish is similar to the sunfish in my tackle box. My best to all of you and for the challenges related to our Great Lakes.
LikeLike